Before starting an print, every time i needed to level the print bed. But the micro-controller (minitronics) and software (marlin) are already prepared for automatic sensing the distance of the bed and compensating during print. What’s needed is an inductive sensor, a mount and a few small software changes in marlin to enable the feature.
The term auto-tramming is from the CNC world, where the mounting surface is made level to the CNC by running it over with a router in the lowest position. Since we don’t modify the bed itself, i prefer auto leveling, because the software is keeping the nozzle perpendicular to the print bed during printing. But it’s up to you how to call this.
Sensor mount
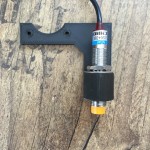
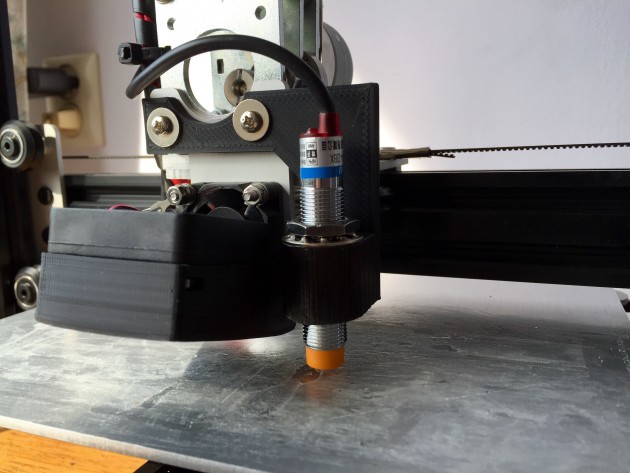
 For the sensor mount, i did not want to bolt it on top of the ventilator, but directly on the aluminium of the extruder. The design was done in OpenSCAD en the hole thing is posted on Thingiverse.
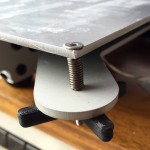
When mounting the sensor, position it around 1mm above the extruder point, so it never touches anything on the print bed (the extruder is the lowest point). Be careful with your bolts sticking out above the print bed, use tapered bolts and countersink your holes. In my heated bed, i can’t make them level with the print bed, because the holes are to much on the side, but with a little effort they will be low enough so there is no danger for collision.
Electronics
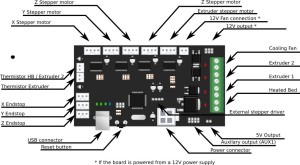
I used a LJ12A3-Z-4/BX cheap proximity sensor (between €2 and €3 on Banggood). The sensor is powered from the permanent 12V connections on the minitronics board. (upper right in the picture where it says 12V output. And the sensor output is connected to the Z-EndStop connector (instead of the switch). Since the output voltage is to high for the 5V logic of the minitronics, i use a 8k2 resistor to ground and keep the internal pull up resistor active (that’s configured in marlin), so the level is either 5V or 0V. The wiring on the minitronics connector for the Z-endstop is input,minus,plus (plus is on the edge of the board, and we don’t use that one).
Software
There is not much that needs to be altered in the marlin software, all of it is in “Configuration.h”
const bool Z_MIN_ENDSTOP_INVERTING = true;
Since the logic of the sensor is the other way round as the physical end-switch.
And remove the comment before:
#define ENABLE_AUTO_BED_LEVELING
to enable the automatic bed leveling process.
You will need to define the probe points. Because the sensor has an offset from the extruder nozzle the right side probes need to be more on the inner side of the bed. After some tuning, these were the points i came up with:
// these are the positions on the bed to do the probing

  #define LEFT_PROBE_BED_POSITION 35

  #define RIGHT_PROBE_BED_POSITION 195

  #define BACK_PROBE_BED_POSITION 165

  #define FRONT_PROBE_BED_POSITION 10
But for your first time it’s better to start with safe values, so larger numbers for LEFT_PROBE_BED_POSITION and FRONT_PROBE_BED_POSITION and smaller numbers for RIGHT_PROBE_BED_POSITION and BACK_PROBE_BED_POSITION. As you might have guessed the numbers represent millimeters.
Also define the offset of the sensor from the nozzle, with my mount on a Mamba3D this is:
// these are the offsets to the prob relative to the extruder tip (Hotend - Probe)

  #define X_PROBE_OFFSET_FROM_EXTRUDER 34.0

  #define Y_PROBE_OFFSET_FROM_EXTRUDER -32.0

  #define Z_PROBE_OFFSET_FROM_EXTRUDER 0
The Z offset is zero because we will fine-tune this in Slic3r.
Compile and upload.
You can see the sensor trigger because the LED on the LJ12A3-Z-4/BX will light up. The sensor has a sensitivity of 4mm, but thats for metal. For Aluminium is around half that value, so approximately 2mm.
Check with “M119″if the minitronics also sees the trigger output of the sensor. Turn all bed leveling screws so that the springs are completely compressed, or replace the bolts and springs with static spacers.
After that you can issue a G28 home command and a G29 command to start the auto-tramming routing. The default is a 9 point measurement process and now you should see movement in the Z motor during the print of one layer.
If you download the Slic3r setting from the Mamba3D website, you wil find a printer setting called Mamba3D_Autolevel. If you open the configuration and go to Printer Settings, you will see that G29 is in the custom G-code. In the General section you can enter the Z-offset, this is the correction for the position of the nozzle above the printbed. For me this came out to -0.7mm, and i am thinking of making it -0.8.
The way to determing this value is by heating up the nozzle, issuing a G28 Home command and a G29 to run through the leveling steps. Then a G92Z10 which tells the printer that it is now 10mm above the printbed. Now take your piece of paper and move the nozzle down through manual control with 0.1mm steps while moving the paper. When the paper still moves but an extra 0.1mm down would prevent the paper from moving, you are at the right level and can record the number of steps as the value in Slic3r. The complete procedure is very well enlightened in this video of Thomas Sanladerer.
Have fun!
